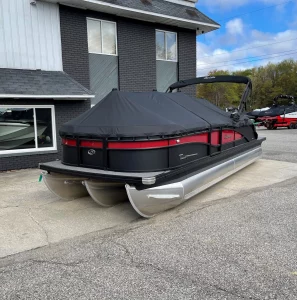
As boating season winds down and colder weather approaches, it’s crucial to winterize your outboard motor to protect it from freezing temperatures and ensure it’s ready for the next season. Proper winterization prevents damage, prolongs the life of your motor, and saves you from costly repairs. Here’s a step-by-step guide on how to winterize your outboard motor.

1. Flush the Engine
Begin by flushing the engine with fresh water to remove salt, dirt, and debris. This helps prevent corrosion and buildup in the cooling system.
- Attach a Flush Kit: Connect a garden hose to a flush kit or muffs that fit over the water intake ports.
- Run the Engine: Start the engine and let it run for about 10-15 minutes. Ensure the water is flowing freely through the engine to flush out any impurities.

Add a fuel stabilizer to the fuel tank to prevent the fuel from degrading over the winter months. This helps avoid problems like clogged fuel lines and carburetors.
- Add Stabilizer: Follow the manufacturer’s instructions for the correct amount of stabilizer to add.
- Run the Engine: After adding the stabilizer, run the engine for about 10 minutes to ensure the treated fuel circulates throughout the fuel system.

Draining and refilling the lower unit gear oil helps prevent water contamination and damage from freezing.
- Drain the Gear Oil: Remove the lower and upper gear case plugs to drain the old oil into a suitable container.
- Inspect the Oil: Check the drained oil for any signs of water or metal shavings, which could indicate a problem.
- Refill with Fresh Oil: Replace the drain plugs and fill the gear case with fresh gear oil, ensuring you use the correct type for your motor.

Fogging the engine protects internal components from rust and corrosion during storage.
- Remove the Air Silencer: Take off the air silencer to access the carburetor.
- Spray Fogging Oil: With the engine running, spray fogging oil into the carburetor until the engine stalls. This coats the internal parts with a protective layer.
- Spray in Spark Plug Holes: Remove the spark plugs and spray fogging oil directly into the cylinders. Turn the engine over a few times by hand to distribute the oil, then reinstall the spark plugs.

Lubricate moving parts and apply marine grease to prevent corrosion and ensure smooth operation.
- Grease Fittings: Apply marine grease to all grease fittings on the motor, such as the steering pivot and control cables.
- Lubricate Linkages: Use a light oil to lubricate throttle and shift linkages.

6. Remove the Battery
Disconnect and remove the battery to prevent it from freezing and maintain its charge.
- Disconnect Terminals: Remove the negative terminal first, followed by the positive terminal.
- Clean Terminals: Clean the battery terminals and apply a thin layer of petroleum jelly to prevent corrosion.
- Store the Battery: Store the battery in a cool, dry place, and periodically check its charge over the winter.

Properly cover and store your outboard motor to protect it from the elements.
- Cover the Motor: Use a high-quality, breathable cover to protect the motor from dust and moisture.
- Store Upright: Store the motor in an upright position to prevent water from collecting in the exhaust or propeller housing.
Conclusion
Winterizing your outboard motor is a vital step in boat maintenance that protects your investment and ensures your motor runs smoothly when the next boating season arrives. By following these steps, you can prevent damage from freezing temperatures, corrosion, and fuel degradation. Proper winterization gives you peace of mind, knowing your motor is well-protected during the off-season. Happy boating and see you next season!